Our First Review!
As I have just purchased and constructed my first MS Composit machine - the new Hornet II, I thought it might be appropriate to review this kit here for others that might be interested.
Before I proceed, I need to stress that this is my own personal review. I purchased this machine myself through normal retail channels and have received no special treatment or discounts from either manufacturer or supplier. The opinions expressed here are purely my own and have not been influenced by any outside source.
Please note that in this review, all words in blue are links to other sites. All images may be clicked on to show the 800x600 sized image.
Reviewer Background....
 I've been flying, sailing and driving models for about 33 years, and have been operating R/C models for roughly 30 of those. Helis are a fairly recent thing for me, and have taken up all of my modeling time (and money!) in the past couple of years. I decided fairly early in the piece to stick to Micros, having found the crash repairs of their larger brethren too hard on the wallet!
As far as my skill set goes, I would class myself as low side of average in flying (no 3-D for this boy!), but a competent, if somewhat untidy, builder.
I'm fairly handy with the electronic and mechanical side of things, I have a good grasp of the theory involved, and have put this to good use in my many experiments and hybrids.
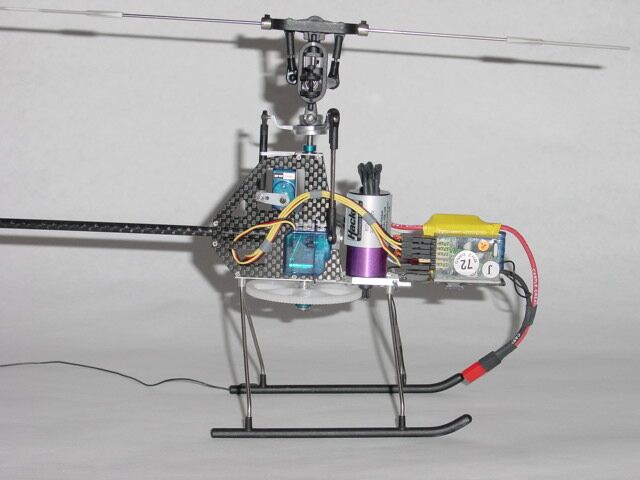
The decision to purchase the Hornet was something of a logical progression for me. Traditionally I have been an Ikarus man, having built, modified and converted a number of machines based around the Ikarus ECO Piccolo with the ultimate development for me being the Piccornet, an Ikarus ECO Piccolo fitted with a full CCPM Hornet head.
About two months ago I got a hankering for another heli. I felt like I had done the Piccolo to death and wanted to try something different, so I decided to try a Hornet.
I discovered through the Hornet Forum that MS were working on a totally new Mark II Hornet. As I was still a little worried about some of the horror stories I had heard about the difficulty in getting the original CP Hornet properly sorted, I decided to gamble on the new machine and put my name down on the waiting list. I'm now very pleased that I did!!!
Back to Top of Page
Manufacturer and Supplier info
MS Composit are a Czech company who have been involved in the micro heli scene since its early days.
 Their original line up was the fixed pitch Hornet, which was quickly followed by what I believe is the only out-of-the-box semi-scale micro heli, the Schweizer 300. Approximately a year ago the Hornet Collective Pitch upgrade kit was released, and this was followed by the full Hornet Collective Pitch kit. This machine is now slowly being superceded by the Hornet CP-X. The CP-X is effectively an upgrade of the original Hornet CP kit, incorporating some of the improvements now found in the Hornet II. MS are not resting on their laurels with the CP-X and Hornet II either - a tandem rotor scale CH-46 Sea Knight is due for release in the very near future!
To non micro-heli pilots, MS are probably best know for their range of carbon fibre blades for a wide range of larger radio controlled model helicopters. They also produce model aircraft and boats too!
I purchased my Hornet II from DeeTee Enterprises in the USA.
I had never dealt with DeeTee Enterprises before, but I based my decision to purchase there both on comments from other Hornet pilots, and by DeeTees extremely active participation in helping out on the Hornet Forum. I have to say that I am extremely pleased with my decision. Dennis (of DeeTee) has been extremely helpful every step of the way, right from my initial tentative enquiries, during the purchase (and subsequent shipping panic), right through to post purchase support and service today.
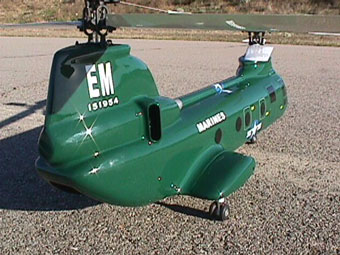 Deetee Enterprises are specialists in electric helis. Along with their full and complete support of MS Composit Hornet products, they also sell and support the Hummingbird fixed pitch micro and the amazing DragonFly tandem rotor helicopter, which now sports an optional CH-46 body!
Back to Top of Page
The Hornet II
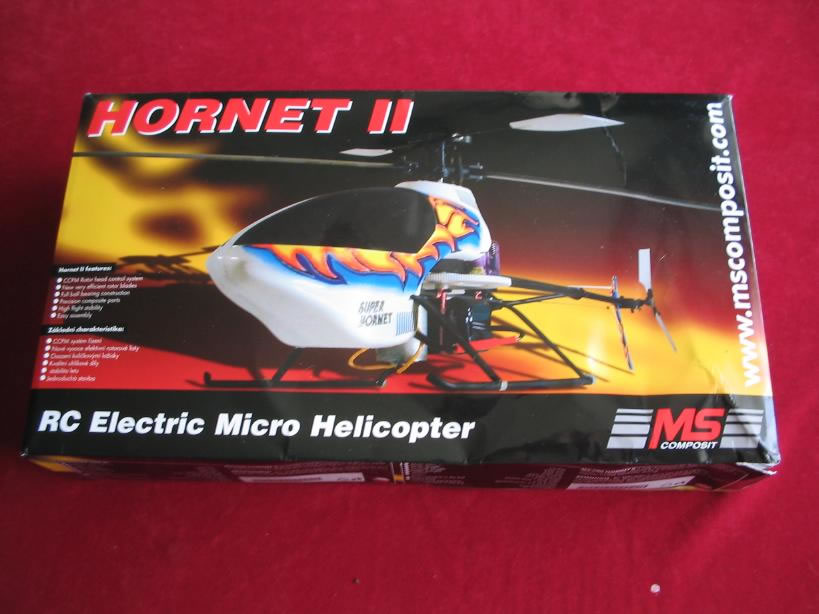
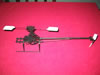
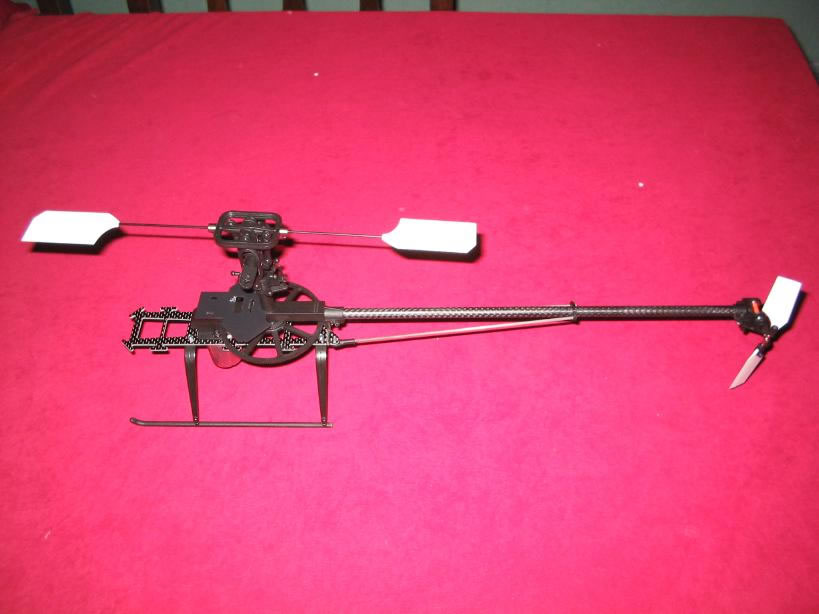
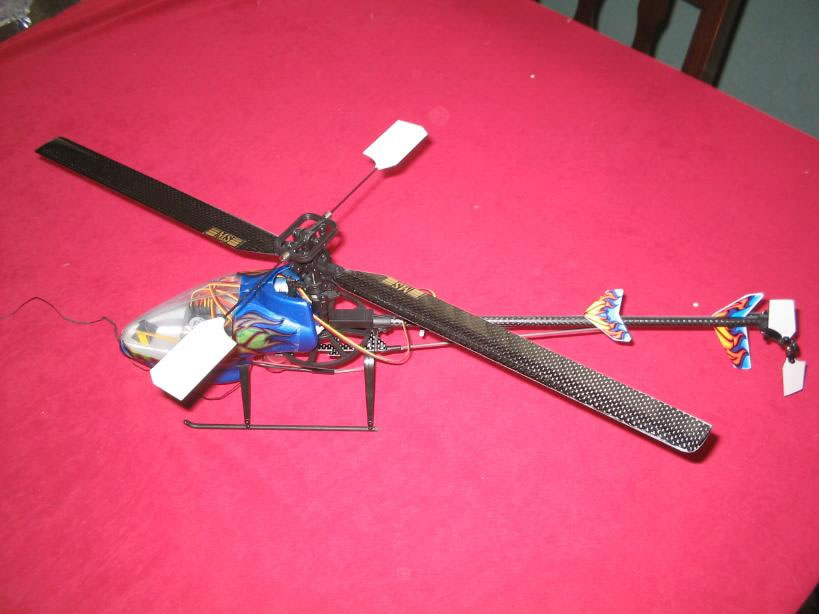
 The Hornet II is MS Composit's latest offering to the Micro Heli consumer. The machine is quite different from both its Hornet CP predecessor, and its new stable mate, the new updated Hornet CP-X. The Hornet II is longer (680mm length overall) and has a larger rotor diameter (560mm).
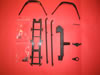
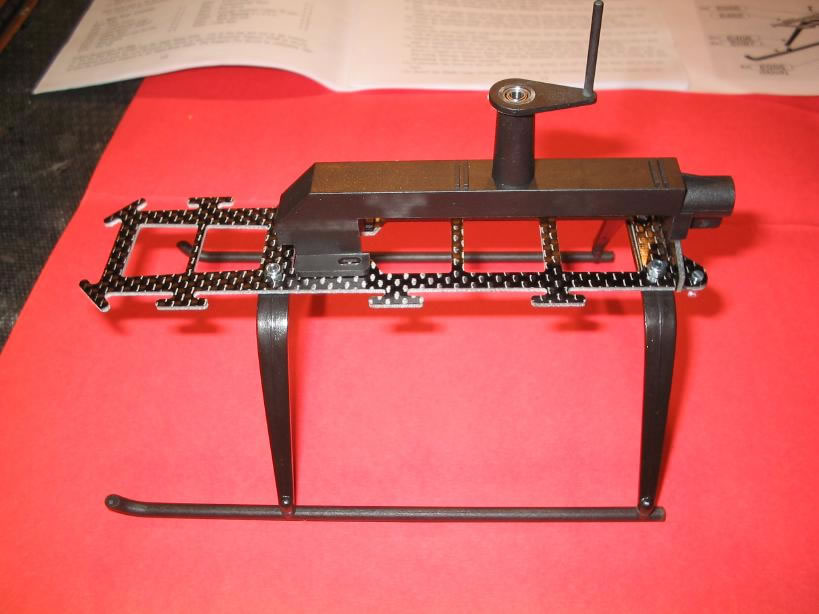
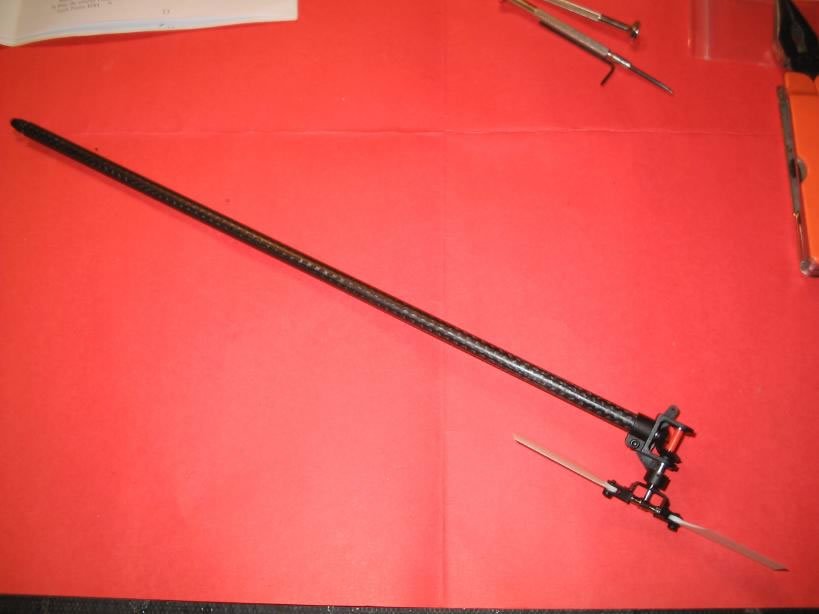
Structurally, the machine features a completely new main frame, canopy, landing gear, tail boom and tail gearbox housing, new all-metal pre-assembled tail blade hub and shaft, a pair of boom braces, and new main rotors.
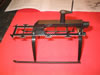 The mainframe is now a two piece unit using a combination of moulded and carbon fibre parts, along with new moulded landing legs and skids. The tail gearbox and tail boom have also been re-designed. The tail boom/drive shaft assembly is longer and has a larger outside diameter (courtesy of a greater wall thickness in the outer tube). The tail boom also now features four bearings to support the inner drive shaft.
A feature of the the aircraft that will appeal greatly to older Hornet flyers is the use of conical drive gears, and tail-boom clamps at the main frame and tail gearbox. This arrangement makes the setting up (and later adjustment) of the critical gear mesh a breeze compared to the earlier Hornets. The pre-assembled metal tail rotor hub and shaft eliminate the other major set-up heartache of the earlier machine's tail.
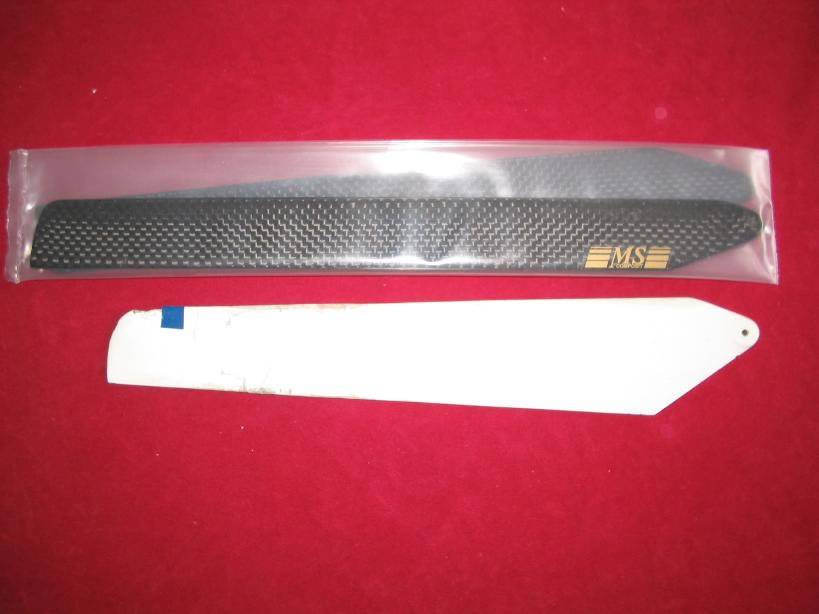
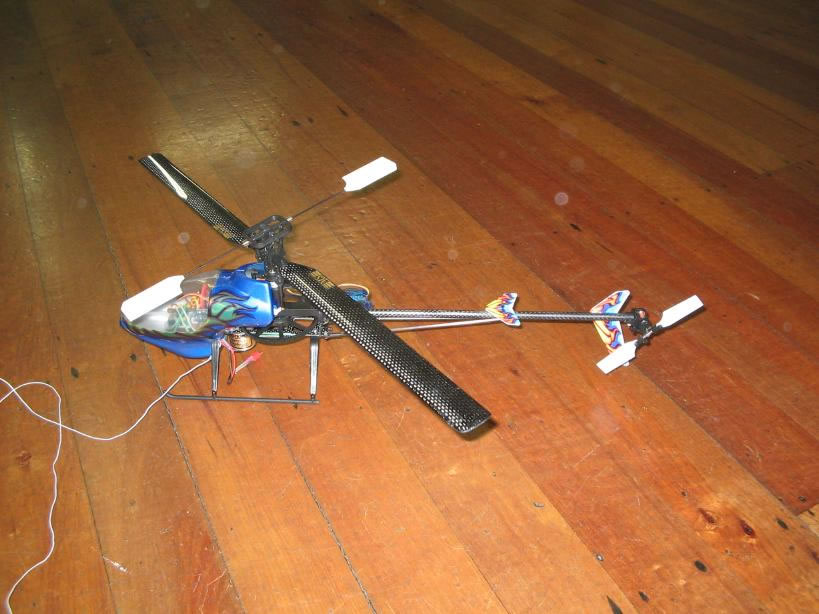
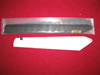 The main rotor blades are also a radical departure from the MS microheli norm. The Hornet II blades are longer, much slimmer in the chord, and feature a parallel, rather than the traditional tapered chord seen on previous MS micros. The high aspect ratio blades, along with the new main frame, undercarriage, and canopy combine to give the heli a much lower, more aggressive 'look' to it. The design style is more closely aligned with it's bigger IC powered cousins than micro-helis have been in the past.
Back to Top of Page
Hornet II - Specifications and Additional Requirements
Main Rotor Diameter: 560mm
Body Length: 510mm
Overall Length: 680mm
Flying Weight: 320-340g
Motor: MS 300 Series
Rotor Control System: CCPM
Additional requirements:
1 x 6 Channel (minimum) CCPM capable Radio Control Transmitter
1 x 5-7 Channel Micro Receiver (if using a 5 channel rx , it needs to have channels 1,2,3,4,6, as pitch is assigned to channel 6)
1 x Speed controller for main motor
1 x Micro Gyro
4 x Micro Servos
6-8 Cell 700mah NiMH battery (or Li-poly equivalent)
Charger for flight pack.
Back to Top of Page
Ordering, The Arrival, and Initial Examination...
I ordered my Hornet II from DeeTee Enterprises in the USA. The machine was shipped by USPS Global Express Mail and arrived one week and one day after dispatch. The delay was due to New Zealand Post taking three days to get an 'overnight delivery' customs advise notice to me, and is in no way any fault of DeeTee Enterprises, NZ Customs, or CourierPost, who made the final delivery.
I would at this point like to thank the people at NZ Customs in Auckland, Nigel Frost of CourierPost (Christchurch) and Courier 45 (Christchurch) for doing a great job of making up for NZ Post's fumble. Between them these people managed to get the heli to me on Saturday, after I discovered on Friday morning that it had been sitting in Auckland customs for three days! Thanks to all involved for their 'above and beyond..' service.
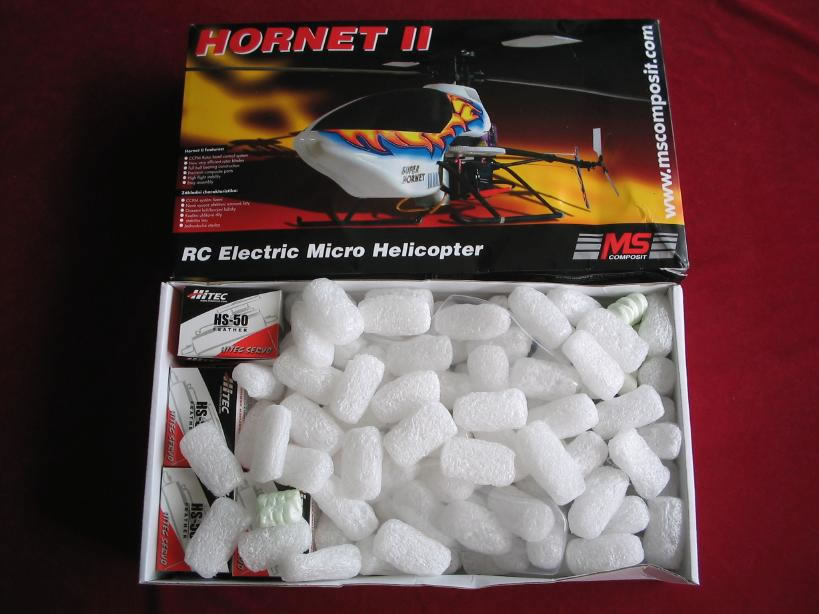
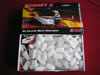 My initial reaction on taking the parcel from the courier was "Oh-oh they've sent the wrong thing!" The box I held just seemed to small to hold a 560mm rotor heli. The parcel exhibited a little 'handling rash' but was in pretty good condition considering the distance traveled and the time of year it was sent. I opened the box to find enough foam chips to re-float the Titanic! On checking the contents I found that everything was present, correct and in good order despite the dings and dents in the box. Dennis certainly knows how to pack things for overseas travel.
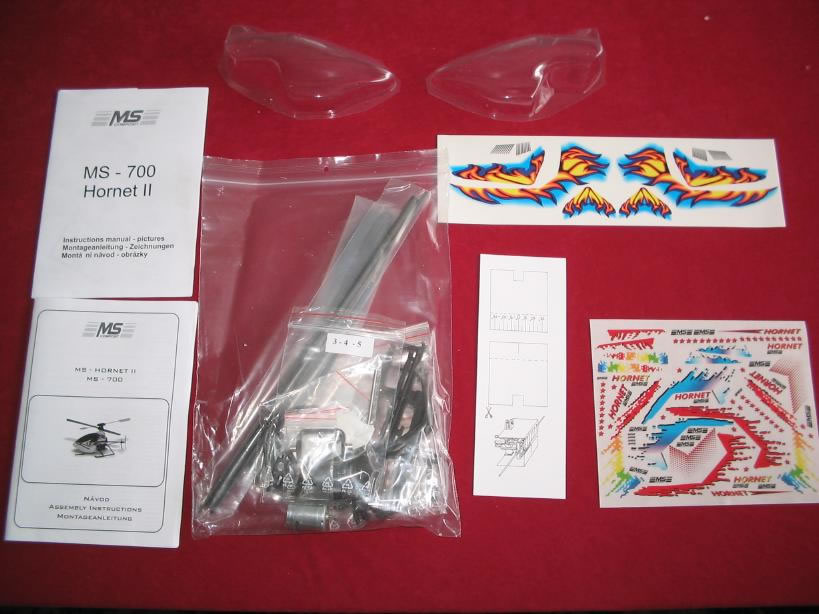
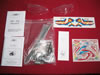 After removing the 4 x HS-50 servos and the MS-50 speed controller that I had ordered to allow me to complete the kit, I set about an in depth examination of the Kit contents. Two manuals (one of written instructions - Czech, English and German - and the other of illustrations) two canopy halves, two decal sheets (Hornet II and the original Hornet), a cardboard pitch gauge, and a large zip lock bag containing all the other parts.
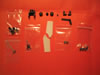
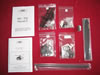 Opening the large zip lock bag revealed the Speed 300 motor, four zip lock bags of parts numbered with assembly stages (1, 2, 3-4-5, 6), one set of Carbon Fibre main rotor blades, and a bag containing the carbon fibre tubes and rods. Each of the assembly stage bags contained both loose parts and smaller zip lock bags of small parts relating to the assembly instruction stage involved.
The quality of moulding and forming of parts is excellent. All parts (with one exception mentioned later) fitted together well and there was no evidence of moulding 'flash' on any parts. Some parts did have slight 'sprue nubs' but these were easily removed with a slight rubdown of sandpaper.
Back to Top of Page
Assembly.....
As the manual is pretty self-explanatory (and also available on-line - Instruction manual and Illustration Manual ) I'm not going to go through a blow-by-blow description of the assembly.
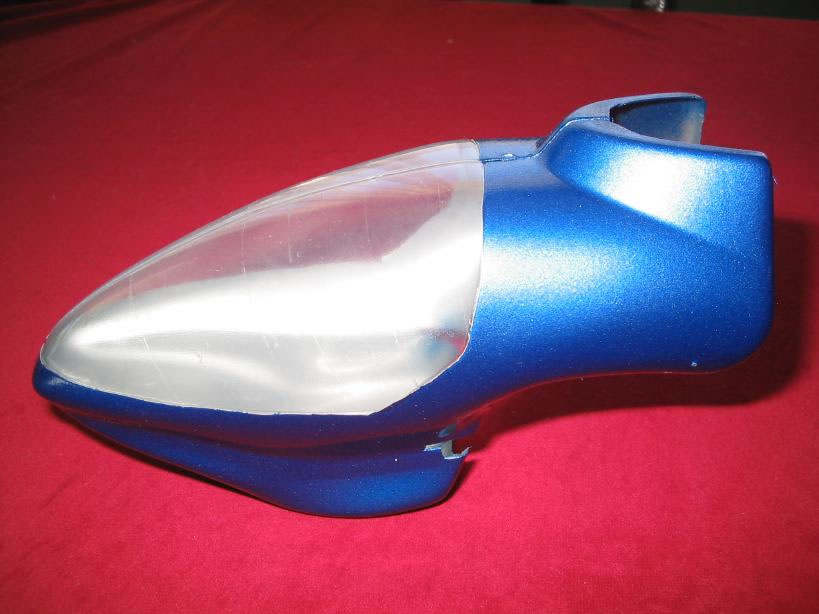
The first item I decide to deal with was the canopy. I had received the heli on Saturday morning, and wanted the machine ready to fly for Monday night's flying session, so constructing the canopy first would give me the opportunity to get it painted and finished as I was working on assembly of the heli itself.
 After cutting out the two halves and trimming to fit (they fit together very well) I washed, sanded and readied the canopy for priming and painting. I applied multiple light coats of primer and rubbed down the finish after each coat was dry. Once I was happy with the base, I applied multiple light coats of blue Candy Apple metallic lacquer, once again rubbing down between coats. I have a reputation for being a very sloppy finisher, but I was really happy with the final result. Although it may not look great to others, it is definitely the best canopy paint job I have done to date!
 The main frame was the first item on the instruction sheet. This went together easily with no issues at all. The only warning I would give in this part of the construction, would be not to be too sparing with the glue when gluing the E403 support into the E401 main frame. When I did this, I applied my usual 'drop of CA on a pin-head' to this joint, and have since found that the joint has come apart on a couple of occasion. With later experimentation I have found that around 3 'pin head' drops of CA to each side of the E403 seems to provide sufficient strength without making the joint too difficult to disassemble if needed.
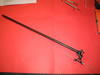
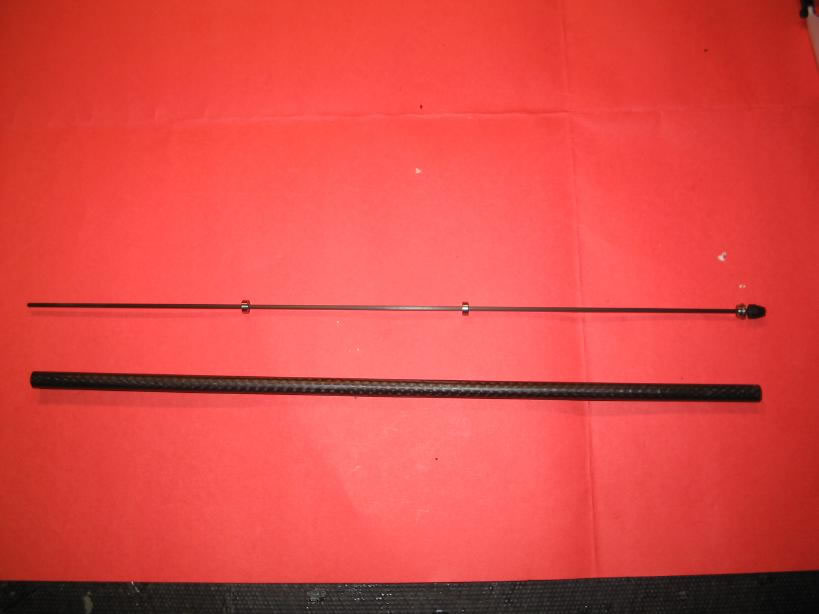
 Next up was the tail boom, tail gearbox, and tail rotor assembly. I must admit that I approached this assembly with a certain amount of trepidation. Older Hornet owners will tell you what a nightmare this assembly can be, and how critical it is to proper operation of the Hornet. Being the cautious type, I decided to 'dry-run' the entire assembly first without any adhesives at all to make sure that I had everything right before committing to final assembly.
 The tail boom/drive shaft assy went together without a hitch, exactly as per the instructions. I was a little surprised at the force required to fit the gears at each end of the drive shaft, but considering that these gears rely totally on friction to secure them to the shaft, it all made sense in the end.
The tail gearbox was next, and it was at this point that I found the only incorrectly fitting part in the kit.
The E038 spacer tube that goes on the tail rotor main shaft, between the L0261 and L0361 bearings was approximately 1.5mm too long. This made the spacer impossible to fit without turning the L0261 bearing around so that the flange was on the outside of the gearbox. As I was sure that this was not correct, I consulted with a local Hornet guru. After double and triple checking that all the bearings were in the correct places, and that everything else was assembled as it should be, we decided that this must be an error on the part of MS. Some very gentle fine sanding of the E038 tube, checking for fit after every few strokes, soon rendered a part of the correct dimensions.
Please note that the length of the E038 is critical to the correct operation of the tail. If it is even fractionally too long, it will distort the gearbox frame forcing it out of square. If it is a fraction too short, it could allow the tail shaft to float, causing all kinds of problems with the tail rotor pitch control. If you do have to perform the same fitting exercise as I did, be very careful when shortening the E038 and check the fit regularly. It should be a neat fit between the two bearing inners without pushing the gearbox frame apart at all.
(Update 02/01/2004: Dennis from DeeTee advises that there is some variation in the size of the E038. He advises that the above 'custom fitting' of the E038 is highly recommended for proper alignment and operation of the tail gearbox. Just remember that what you are aiming for is a snug fit of the E038 between the two bearing inners, without distorting the side frames of the gearbox outwards. Thanks Dennis)
 Having sorted that little issue out, the tail rotor and pitch change assy was next. This is definitely the most 'fiddly' part of the assembly with many tiny pieces all having to fit together perfectly with neither slop nor binding. All credit to MS in that despite the tiny size, this all went together well. I then checked the 'dry-run' assembly thoroughly for slop and binding. Everything was fine, so I stripped everything apart again and assembled it for real. No further issues were forthcoming in the actual assembly of the tail unit.
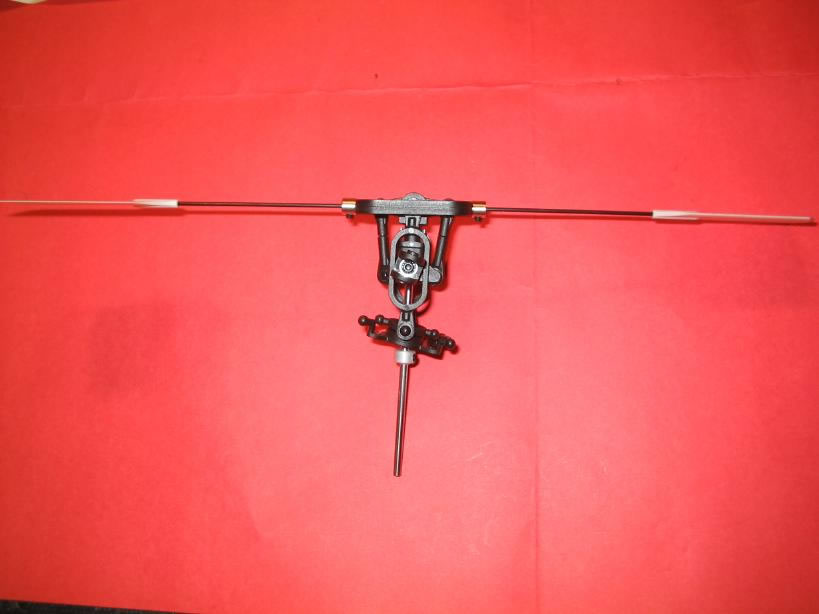
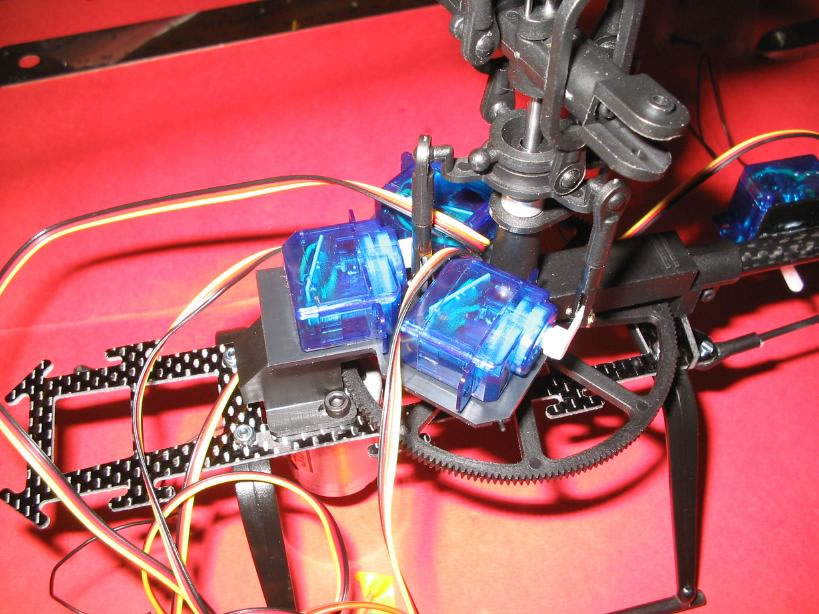
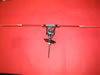 On to the rotor head assembly. This is done in three stages, the main rotor head and shaft assembly, the fly bar assembly, and then final assembly bringing together all the components and adding the swash plate. This was all familiar territory for me as my "Piccornet" is fitted with the same head/swash assembly. The only difficulty I found was in fitting the E077 inserts into the E115 hub. These are a really tight fit to get into the hub, but as I had learnt with my previous experience with this head, quiet perseverance is the answer, rather than brute force and ignorance!
 Final assembly was next. First I fitted up the completed rotor shaft assy to the mainframe and attached the main gear. I then fitted the tail assembly, not forgetting to install the horizontal fin / boom support holder first. I adjusted the gear mesh at both main gear/drive shaft and tail gear/drive shaft, until the mesh was spot on - no binding and only the smallest amount of free play. Once I was happy with the gear mesh I secured the drive shaft at the mainframe and tail gearbox using the bolted clamps, and then re-checked the mesh just to be sure.
Addition of the tail servo mounting plate, main motor and pinion, fins and boom supports completed the main assembly of the Hornet II.
Back to Top of Page
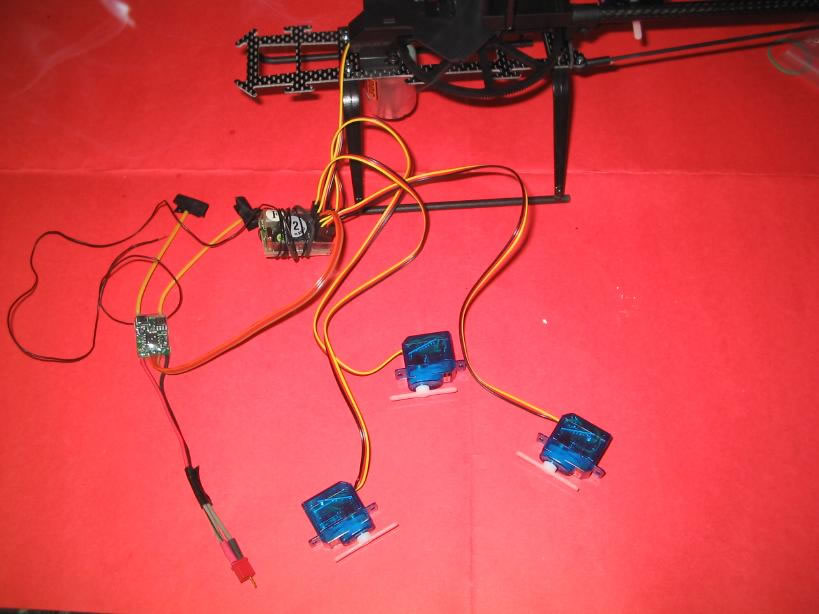
Radio Installation and Setup.
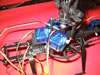
 The radio setup and installation was time consuming, although not overly difficult. Firstly I laid out the the gear on the bench and did all of my setup and configuration on the bench and out of the heli. As I had experience with both CCPM and the Hornet head I found no problems with getting the setup "in the ballpark", and I then transferred the gear to the heli for final checking and configuration. A final check on the bench revealed everything to working as it should be, and so I was ready to start trimming the Hornet II out for flying...
The MS instructions for the radio installation and setup are reasonably comprehensive, and as long as you are familiar with how to set up your radio gear for CCPM you shouldn't experience any problems.
 An absolute beginner with all new equipment would be well advised to consult with a pilot experienced with both CCPM and preferably the Hornet as well. For a total newcomer to helis, the learning curve at this point is steep enough to be described as a learning cliff!!!
Back to Top of Page
Flying.....
After a final bench test of the radio equipment to check control orientation, the motor was finally connected and I spun it up to check the blade tracking. The tracking was spot on, there were no vibrations, and so it was time to start trimming.
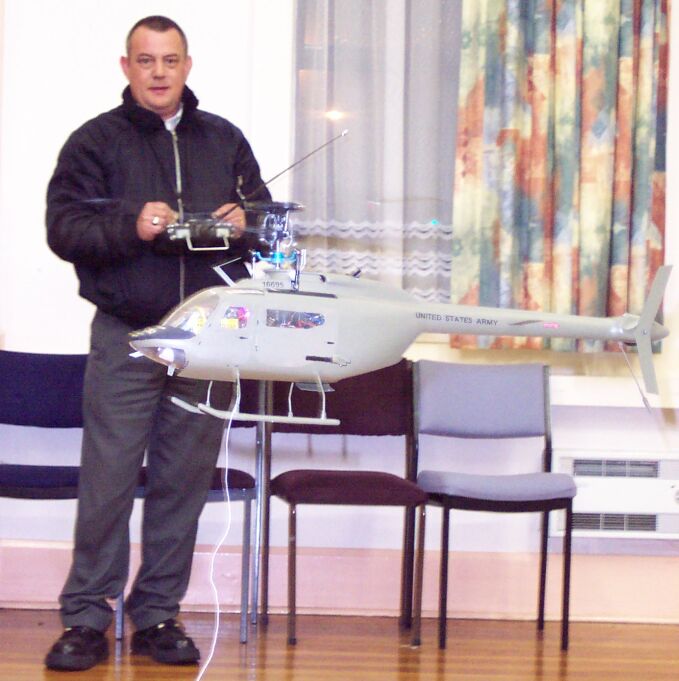
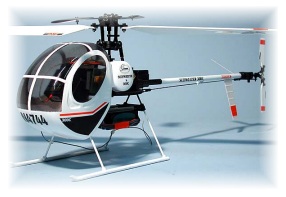
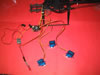
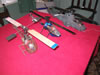
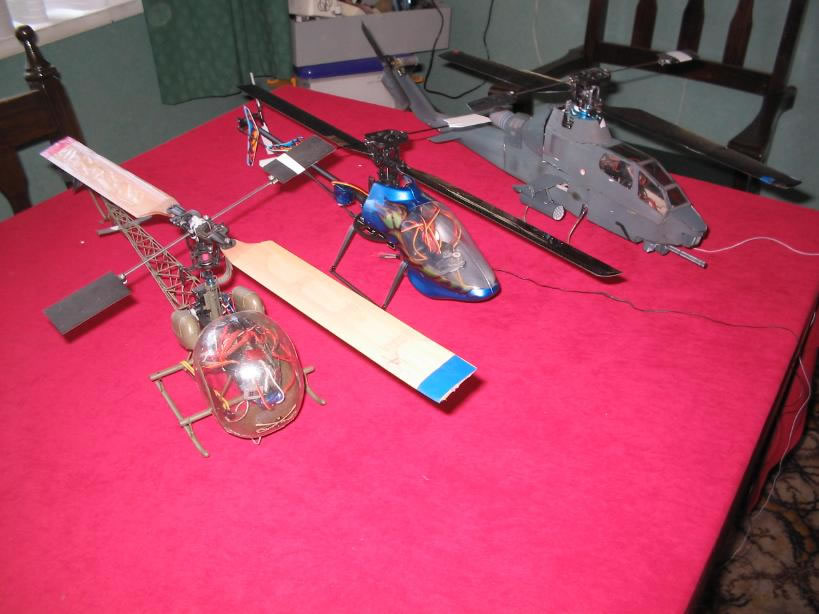
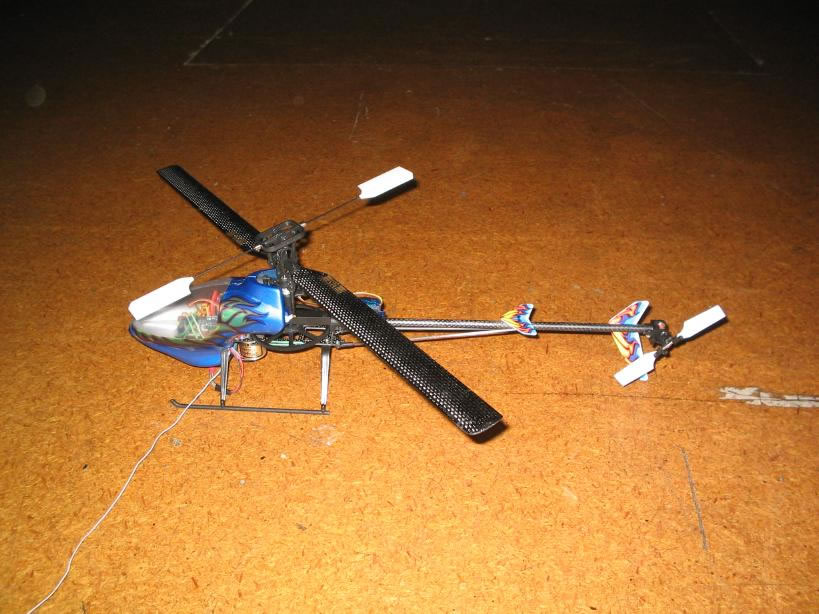
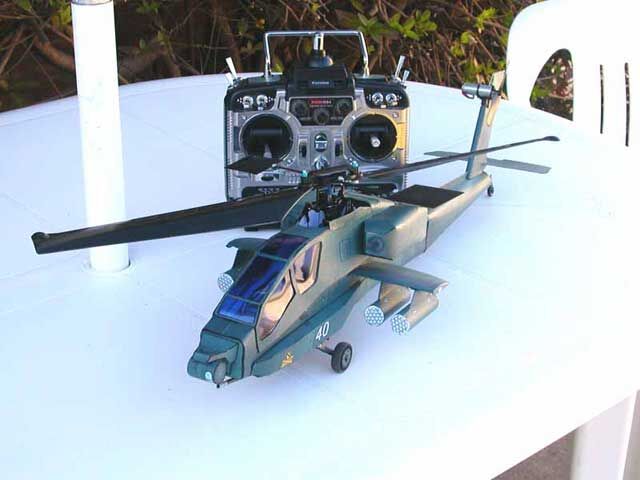
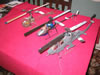 Firstly, a quick 'photo op' with the rest of my fleet - I wanted to ensure I had pictures just in case the worst happened! I then took the machine through to my living room, placed it on the floor, switched on the transmitter and plugged in the heli's battery. A quick final check of control orientation confirmed that all was well, so I advanced the throttle slowly. The motor spun up smoothly, there was no sign of vibration, so I advanced the throttle again until the heli was 'light' on the skids. At this point I was surprised to find that the Hornet II was exhibiting no out-of-trim behaviour, so after a couple of seconds of sitting just off the hover, checking that all was well, I popped the throttle a little more.
 To my absolute surprise, the Hornet II lifted off the ground and straight into a stable hover about 30cm off the lounge floor. A little touch of rudder trim was required to get the tail in place, but otherwise the trim was perfect off the building board! I was impressed! Some exploratory prodding with the sticks revealed good flight responses in all axis with excellent flight stability. This was despite flying in my own backwash, in my relatively small living room. The rest of the day consisted of charging batteries and hovering around the living room as I got a feel for my new Heli.
 Monday night arrived, and it was time for the Hornet II's maiden flight at our hall. I started off with some quiet hovering again, just to make sure that everything was responding correctly. Once again the Hornet II was rock solid, so I advanced to forward flight. Our hall is not overly large, so I kept the speed down, but I was soon doing circuits, figure eights and pirouettes and loving every minute of it. There is no doubt in my mind that the Hornet II is the most responsive, yet stable, micro heli I have ever flown.
I have been following the progress of other Hornet II flyers out on the net, and it turns out that the Hornet II is a very capable little microheli. Advanced pilots are flying 3-D with it, performing maneuvers that until now have been the sole domain of much larger powered model helicopters. This is well demonstrated in this video of some extreme Hornet II flying courtesy of Mike "MadMan" DeMita.
At the same time the Hornet II is quite docile in the hands of a below average flyer such as myself. Over the past two weeks of flying the Hornet II, I have found that its stability and precision are encouraging me to start to move outside of my own comfort zone and try different maneuvers while flying.
Back to Top of Page
Conclusion....
 The MS Composit Hornet II is a great Micro-heli. It is well packaged, well constructed, and flies really well out of the box. The improvements over the older model have eliminated all of the old Hornet problems with vibrations, and getting the tail rotor set up right.
For average to experienced pilots the Hornet II represents a great machine to own and fly. Average fliers will find it encourages them to try new and different things, while experienced fliers will find its 3-D capabilities truly exciting.
I probably wouldn't suggest the Hornet II as a first time heli for an absolute beginner, unless they had access to an experienced Hornet Pilot who could help guide them through the finer points of setting up. Gear mesh, setting up CCPM Heli radios, and getting the heli in initial trim ready to learn to fly are all areas that are greatly aided by having an experienced pilot handy.
 Despite the mechanical complexity of the machine (compared to say the Ikarus Piccolo series), the Hornet II is quite crash resilient. I have had a few 'incidents' while flying it, which have resulted in unscheduled arrivals into the ground. The new boom supports do a great job of performing double-duty as boom protectors. I have had a number of boom strikes as a result of arrivals, and on each occasion the boom support has sacrificed itself while saving the tail boom from any damage at all.
Well done MS Composit, with the Hornet II you have a real winner on your hands!
Back to Top of Page
Picture Gallery
There are more pictures of the Hornet II and its construction in this photo gallery. To view the complete Hornet II construction photo gallery, please click on the following link:
Hornet II Construction Photo Gallery
I also have some more photos of the Hornet II coming, including in-flight pictures. I'll add these in as soon as I get them.
Back to Top of Page
Review Details...
Review Hornet II manufactured by
MS Composit and purchased from
DeeTee Enterprises. Purchase price $215.99 US.
Review by
Jon Walker of
MicroHelis New Zealand, and active member of the
Christchurch MicroHeli Group. More pictures and information on Jon's machines can be found at
Jon's Microhelis.
Please email any comments, questions, or suggestions to the
Webmaster.
Back to Top of Page

 Web Wide Hosting


